I wanted to add this page to my website in case any of the visitors wanted to understand, in case you didn’t already know, the process in which a polished stone becomes even more amazing looking, then in its rough form.
The process and steps I go through when thinking of a piece I want to make are as follows (usually). First I find the type of rock I want, either from my stash, or I trade with someone who has what I want, or I buy it in bulk, so I can use it for something else later on.
Once I get the rough (the rock) I have to figure out if I’m going to tumble it to polish it, use a vibratory type polishing process, or use a wet saw to get the size I want and then shape and polish it on my cab machine. Tumbling rocks to get a polished look takes approx 7 days in each stage, sometimes longer depending on the type and hardness of the stone. Using a vibratory tumble can sometimes cut the process in half. Again depending on the stone.
When you use a rock tumbler the stones become much rounder and you lose more of the natural shape. I mean they literally are spinning around in a tumbler with water, grit, and other like rocks. The spinning motion makes them tumble inside the cylinder slowly wearing down the rough edges and when they rub against each other with grit all over them, it’s like sandpaper in a sense. You start out at a 60-90 grit ( stage1 ), then you remove them and see if there are rounded enough, if they are you inspect each one for fractures and or chipping, if they’re damaged in any way, you remove them.
Then you rinse and clean off all and any grit that is on them. Some stones you have to scrub each stone to remove the rough grit. You absolutely can’t have any 60-90 grit contaminating the rocks going into the next stage. Stage 2 you move onto 180-220 grit, and go through the same process, again can take 7-10 days. Once you check them and if they are to your liking you rinse and clean each one again, before going into stage 3. We’re you use a 500-600 grit, some call this a pre-polish stage. Again another say 4-7 days in this stage. If they look shiny n nice when wet, and your happy with the shape and finish, you rinse and inspect and get them ready for the final polish stage. This is by far the hardest stage to wait for. You know once this stage is over, you are going to have some amazing treasures!! I’m guilty of checking them often and even stopping too early. Only to have to reload the cylinder and that’s not good. You wasted that polish.
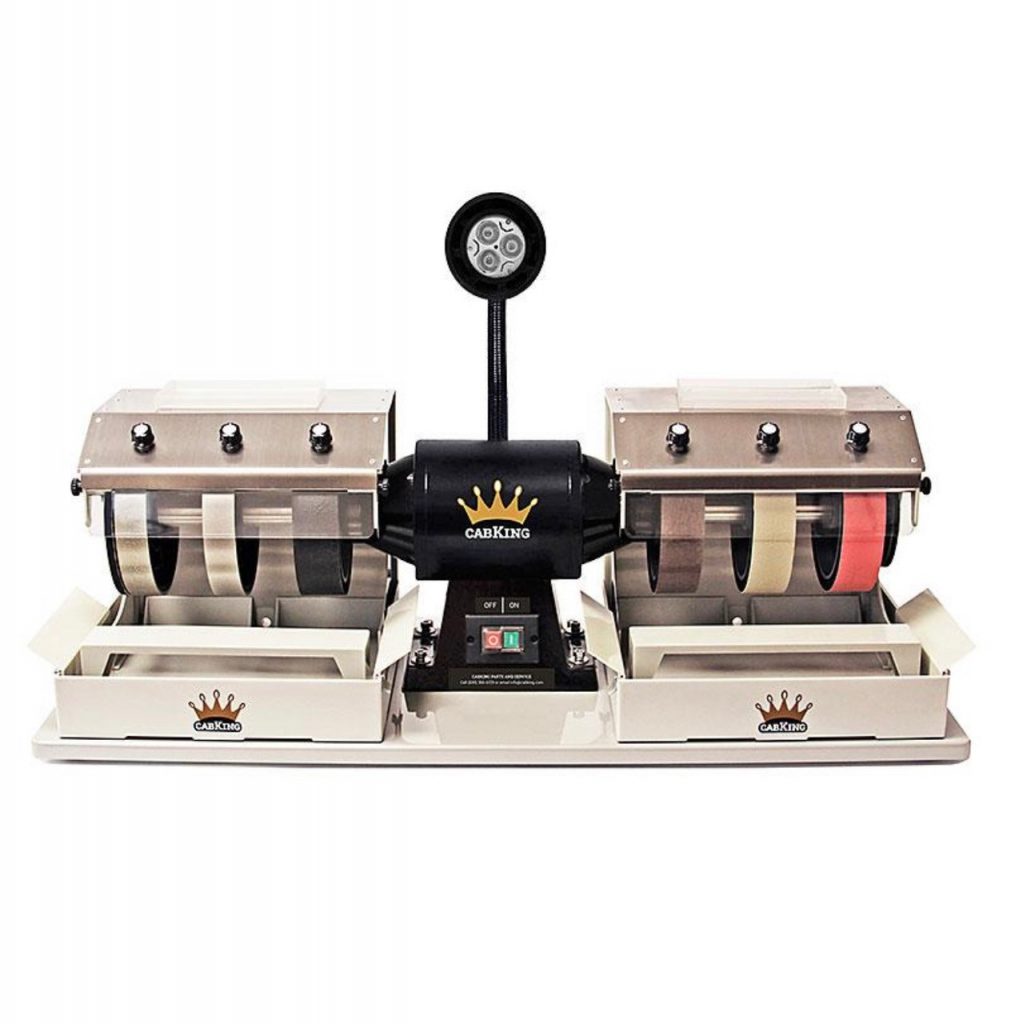
Using my cab king 8 (https://cabking.com/products/cabking-8) rock polisher is another way a lot of my creations come about.

With this awesome machine you are basically repeating the steps of the tumbler, but one piece at a time. You find the stone or rough you want to work with. Decide the piece you want to make, size, and shape, and then either you start on the 80 grit diamond wheel, or you use your slab saw or wet saw to cut the desired rough shape. Now depending on the size and or shape you want to make, you might want to adhere the stone to a dop stick.
This allows you to maneuver the stone by holding a stick instead of just holding the stone. Some pieces I dop, some I hold by hand. For the small say 6-10 mm rounds or ovals, I’m usually always using a dop stick. I’ll attach some photos, that might help understand what I’m meaning better.
So again once you have your idea, shape, and material ready to hit the machine to begin your creation. You begin with 80 grit diamond wheel, removing sharp edges and getting your piece into its rough shape you’re looking for.
The next wheel is 220 grit, then 280, then I use a flat lap with 320, then you start at the pre-polish wheel 600 grit, then 1000 grit, then you use your 3000 polish wheel. Once you’ve gone through all the stages and you’ve achieved the look, shape, size, and shine you’re wanting. I follow most pieces up on the flat lap leather pad using 50.000 grit diamond paste.
I can’t say enough great things about my CabKing 8”. It is so well made. It’s a perfectly balanced smooth running gem.
If you have any questions or want to see more photos of the process, or maybe a video – email me at Info@alwaysnaturnallystoned.com
Thanks for checking this out and again if you have any questions feel free to email me. I tried to keep the process semi-short as to not confuse or boar any readers. Trust me I could keep going! There really is so much more to share and show.
Here’s some photos showing my machine (& mess). Some of the stages etc. what some pieces look like just out of the tumbler, and some rough to finished pieces done on the CabKing. If the photos are rough, I just snapped some shots. You’re looking at the real-time creation zone. Seen at the moment of the photo. I do clean up the area, so I can start a new mess.